Winter Bike Commuting — How to Ride Safely When It Is Cold and Dark
This article includes affiliate links. We may earn a commission at no extra cost to you.
Winter bike commuting has grown more complex with the gear listicles flying around. Every article opens the same way — here are jackets, here are gloves, here is how to layer. As someone who rode through six Chicago winters, I figured out how to handle what actually gets cyclists into trouble out there. And it was never the gear. My real problem was that I had no systematic way of thinking about risk. Every morning I was just winging it — hoping the roads were okay, hoping drivers could see me, hoping my tires would hold on that one sketchy corner near the underpass. Hope is not a safety strategy. What follows is the actual framework I use now, built from years of close calls, one slow-motion crash on black ice outside a Walgreens parking lot, and a lot of subsequent digging into what genuinely keeps cyclists alive in winter conditions.
The Real Risks of Winter Commuting — And How to Manage Them
Most articles dance around this, so let me just say it plainly: winter cycling has specific, identifiable hazards. If you do not know where they live, you will find them with your front wheel instead of your eyes. That is a bad way to learn.
Ice does not form uniformly across a road surface. It concentrates in predictable locations — and knowing those locations is genuinely half the battle.
Bridge decks. Bridges freeze before road surfaces every single time. The deck is exposed to cold air from both above and below, so it sheds heat faster than pavement sitting on solid ground. If your commute crosses any bridge — even a short one over a drainage ditch — assume ice on that deck whenever the temperature is near freezing. Even if the rest of the road looks perfectly fine.
Shaded corridors. Any stretch of road that misses direct sunlight during the day stays colder longer. Tree-lined paths, roads running between tall buildings, north-facing sides of any street — these spots hold ice for hours after sunny sections have cleared. I learned this one personally on a path cutting through a park near my old apartment. Beautiful ride in July. Absolutely terrifying on January mornings.
Intersections. This one surprises people. Intersections pull in water from multiple directions, get compacted and refrozen, and sit slightly lower than surrounding pavement where water tends to pool. The area right in front of a stop line — exactly where you are trying to brake or get a foot down — is frequently the iciest part of any given block.
Reduced driver visibility compounds all of this. In darkness, drivers are not scanning for cyclists with the same attention they give other cars. Their reaction time to a cyclist appearing in headlights is slower. Your braking distance on cold, wet, or icy pavement is dramatically longer than what summer riding has trained you to expect. The practical fix: increase your following distance, scrub speed before curves and intersections rather than through them, and never assume a car has spotted you.
Route Planning for Winter — Choose Differently
Your summer route is probably not your safest winter route. That is not a small tweak — it is a genuine reconsideration of where you ride.
Most cyclists instinctively avoid busy roads in favor of quieter side streets. In winter, that instinct frequently leads you wrong. Main arterial roads get treated with salt and sand first — and most heavily. More traffic means tires have already worn ice down or spread grit across it. Lighting is better. Side streets, especially in residential neighborhoods, might sit untreated for days after a storm — packed snow turning to ice overnight and staying that way all week.
Frustrated by a particularly brutal commute on an “easy” residential shortcut, I restructured my entire route to favor treated main roads — even when that added four or five minutes to the ride. Worth it every single time. Spare yourself the wrong turn I took of clinging to the quiet streets just because they felt safer in August.
There is also a real difference between morning and evening hazard profiles that most people never account for.
Morning — especially pre-dawn — is black ice territory. Temperatures sit at their lowest. Any moisture from the previous evening has had all night to freeze and refreeze. A road surface that looks wet might actually be a thin, nearly invisible glaze. Treat any damp-looking road at dawn as potentially iced until you have had a chance to gently test traction.
Evening is a different animal. Temperatures have usually risen during the day, converting ice to slush. Slush is slippery in its own right — it shifts under tires, fills potholes invisibly, and gets pushed to the edges of bike lanes where you are actually riding. Evening also brings heavier traffic and more aggressive drivers trying to get home. Your evening hazards are slush management and attention — not the same problem as morning black ice, but a real one.
Build an alternative route for bad days. Identify the one or two sections of your commute that carry the highest winter risk — a steep descent, a bridge, an unlit stretch — and plan a detour around them that you can execute without much thought. Having that plan ready means you actually use it instead of defaulting to the familiar road on a morning when your brain is not fully online yet.
Visibility in 5 PM Darkness — What Drivers Actually See
Worth flagging before going further, because visibility is the lever with the highest safety impact relative to the effort required to get it right.
A front light at 600 lumens is the floor — not the goal. I run a Lezyne Macro Drive 1400XXL on my commuter, picked up for around $90, and it makes a measurable difference not just in how well I can see the road but in how early drivers actually notice me. At that output I show up in peripheral vision. At 200 lumens, I do not. Rear lights should run at minimum 100 lumens with a flash mode. The Cygolite Hotshot 150 — around $35 — is what I currently use, and it is genuinely bright enough to be uncomfortable to look at directly. That is exactly what you want.
But what is the single most underrated visibility purchase in winter cycling? In essence, it is a pair of $8 reflective ankle straps. But it is much more than that. Reflective ankle straps are actually more effective at catching driver attention than reflective vests — because of motion. A vest reflects light in a static position. Reflective material on your ankle moves in a circular pattern with every pedal stroke, and the human eye is extraordinarily sensitive to moving light sources in darkness. Drivers notice the moving reflection before they register the static one. Almost nobody talks about ankle straps because there is no money in selling an $8 product. That’s what makes them endearing to us budget-conscious commuters who just want to get home alive.
Wheel reflectors handle lateral visibility — the angle that headlights from cross-traffic illuminate. Your front and rear lights do almost nothing for a car approaching from the side. Spoke reflectors or reflective tire sidewalls close that gap. They are cheap. They work.
The overall principle: think about what you look like from every approach angle — front, rear, and side — from at least 100 feet away. Any angle you cannot account for is a gap.
Tires and Braking — The Only Gear That Actually Matters for Safety
This is not a gear article — I meant that. But tires and braking are not gear in the comfort sense. They are the physical interface between your body and whether you crash. So they get a section.
Studded tires on ice are transformative. Schwalbe Marathon Winter tires — roughly $70 to $85 each — use tungsten carbide studs that bite into ice and provide grip that would otherwise simply not exist. On a genuinely icy morning, the difference between studded and standard tires is the difference between confident forward motion and slow, white-knuckled survival. If you commute in a climate that sees regular ice, studded tires are not an upgrade. They are the baseline.
If full ice is not regular but cold, wet pavement is — go wider. A 35mm tire at lower pressure, around 50 to 55 PSI instead of 80 to 90, gives you more contact patch and better grip than a narrow road tire ever will in those conditions. My commuter runs 38mm tires year-round. Reasonable compromise.
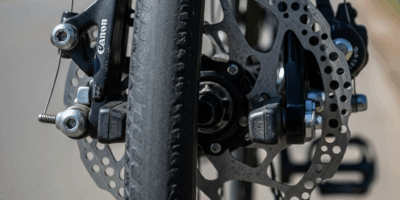
Disc brakes have a real advantage in winter — they are not affected by wet or contaminated rim surfaces. Rim brakes on a cold, wet morning have dramatically reduced stopping power, especially until the pads have made several rotations clearing the rim. If your bike has disc brakes, use them with confidence. If it has rim brakes, compensate with earlier braking initiation. Earlier than you think you need to.
The specific technique that matters most: brake before turns, not through them. On any slippery surface, braking while a wheel is at an angle drastically increases the chance of a slide-out. Get your speed down in a straight line before the turn begins. Every corner. Every winter day. Regardless of how the road looks.
When NOT to Ride — The Smart Decision
Having a backup plan is part of being a competent winter commuter. Without one, you will eventually ride in conditions you should not — because the alternative feels like failure or inconvenience.
Active black ice warnings from local road authorities — the kind issued when conditions are confirmed dangerous for motor vehicles — mean the roads are objectively hazardous. Do not ride. A car sliding through an intersection has no ability to avoid you, regardless of how visible you are or how good your tires happen to be.
Heavy snowfall during commute hours creates a different problem: accumulation rate. If snow is falling faster than traffic is packing it down, you are effectively riding in loose, unpredictable surface conditions that change every few minutes. I have ridden in active snowfall successfully. I have also pushed my bike three blocks because I misjudged how fast it was coming down — apparently my read on “light flurries” was optimistic. That second experience taught me to check hourly forecasts before heading out, not just the daily summary.
Temperature thresholds for exposed skin are real and specific. At minus 15 degrees Celsius — 5 degrees Fahrenheit — exposed facial skin can sustain frostbite in under 30 minutes. Your commute might be shorter than that. But factor in windchill from riding at 15 to 20 mph and those numbers shift fast. Below minus 10 Celsius, without complete face coverage, you are accepting a genuine risk of cold injury. Personal decision — but it should be an informed one.
Skipping a ride is not a failure of commitment. It is the same risk-management thinking that makes every other winter ride safer. The commuters I know who have ridden through the most winters without serious incident are not the ones who never miss a day. They are the ones who decided clearly what conditions cross the line — and held to that assessment even when part of them wanted to just gut it out.
Ride in winter. It is genuinely great — quiet roads, cold air, a feeling of competence that summer cycling never quite delivers. Just ride it like someone who did the planning, not someone hoping the roads are fine.


Stay in the loop
Get the latest safe cycling zone updates delivered to your inbox.